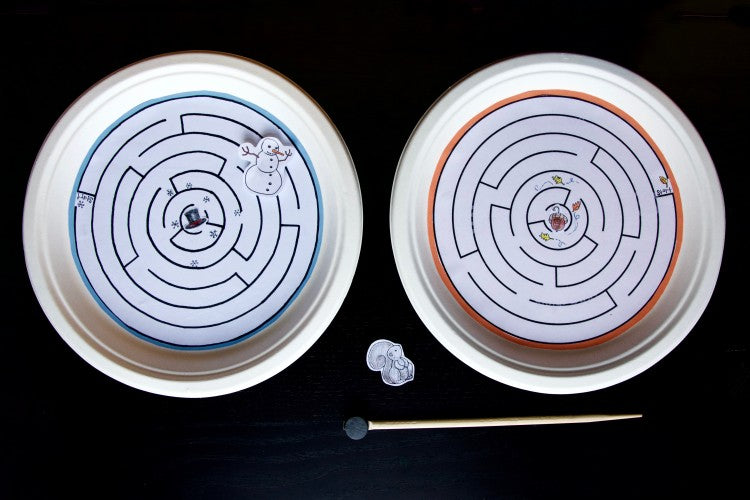
Easy DIY Magnetic Paper Plate Maze
A fun little project to keep your little one engrossed. This magnetic maze is also a good way to introduce them to magnets and how they work.
To make these paper plate mazes, you will need:
- Paper Plates
- Chopsticks
- Neodymium magnets/ strong magnets
- Glue (tacky glue or hot glue)
- Glue Stick
- Scissors
- White Cardstock
- Maze Printable (can find online)
Making the Maze.
After printing out the maze on card stock, print out small graphics. These graphics act as characters that will move along the maze. Carefully cut out the maze and the graphics.
Once everything is cut out, use a glue stick to attach the maze to the paper plate.
The Wand.
To make the neodymium magnet wand, use tacky glue to attach a neodymium magnet to the end of a wooden chopstick. Place a small blob of glue to the neodymium magnet, then lay the chopstick on top of the glue. Allow it to dry overnight, if you use hot glue it will be ready in minutes.
The Graphics
Once the wand is ready, move on to make the neodymium magnet graphics.
Before gluing the neodymium magnet to the cut out characters with tacky glue, make sure the side that would be facing the plate (and the magnet wand below) is of the opposite polarity than the neodymium magnet wand. Basically, you want to make sure your wand and your graphic will attract and stick together, not repel each other.
Once everything dries up, bring over the little ones and introduce them to their new toys.
Looking for strong magnets for fun DIY or school projects? Visit RingBinderDepot.com or click here.
Source: https://thestemlaboratory.com/magnetic-paper-plate-maze


